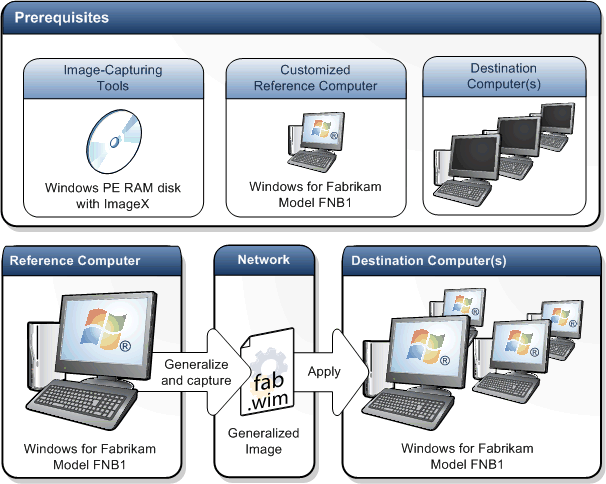
This section describes how to capture images from your reference computer and then deploy them to multiple destination computers. This process is sometimes called build-to-plan.
Prerequisites
- Image-capturing tools, such as a
Windows® PE RAM disc with ImageX. For more information on
creating a Windows PE RAM disc with ImageX, see Windows PE
Walkthroughs.
- Reference computer with a customized Windows
installation. For more information, see Phase 3: Preparing and
Customizing Your Windows Image and Deploy Windows by Using
Windows Setup.
- One or more destination computers.
In This Section
The topics in this section describe the following processes:
- Prepare to capture an image by generalizing the computer and
setting the Windows activation clock.
- Capture images of the Windows hard disk partition, and other
partitions as needed, by using image-capturing tools.
- Copy the images to a network share.
- Apply images to the hard drive by using image-capturing
tools.
You can modify this process to automate various steps. For example, you can write a Windows PE script to automatically connect to a network and then apply an image.
The following diagram shows how the fictitious OEM, Fabrikam, captures a customized Windows image as a file on their reference computer and then applies the image to multiple destination computers:


|
Note: |
|
The default image file (Install.wim) included with the Windows product DVD functions only with Windows Setup (Setup.exe). Do not apply this default image directly to a partition. |
|
Capture and deploy a single-partition Windows image from a network share. |
|
|
Capture and modify images using image-capture tools. |
|
|
Apply images using image-capture tools. |