At this point you should already have installed and configured Windows Azure Pack for Windows Server and the corresponding management portals for administrators and tenants. If you have not yet done so, install Windows Azure Pack by following the steps in the Deploy Windows Azure Pack for Windows Server documentation set.
After the core installation of Windows Azure Pack is in place and you have determined the architecture that is appropriate for your Web Sites scenario (Capacity Planning for Windows Azure Pack: Web Sites) and performed the Windows Azure Pack: Web Sites Pre-installation Steps, you are ready for the formal installation of Windows Azure Pack: Web Sites.
To begin, you will use the Web Platform Installer on the server or VM that will become the Web Sites Controller.
You will then be taken to a Web Sites Setup page where you will specify a SQL Server for the Web Sites Runtime Database, and provide management, worker role, and service endpoint credentials.
After choosing a file server type and specifying a file server name, you will specify a site store (content share) on the file server, provide file share owner and file share user credentials, and specify a path and credentials to the certificate store on the file server.
Finally, you can decide whether to participate in the Customer Experience Improvement Program and/or opt to receive Microsoft Updates for Windows Azure Pack: Web Sites, which is highly recommended.
Install the Web Sites Controller
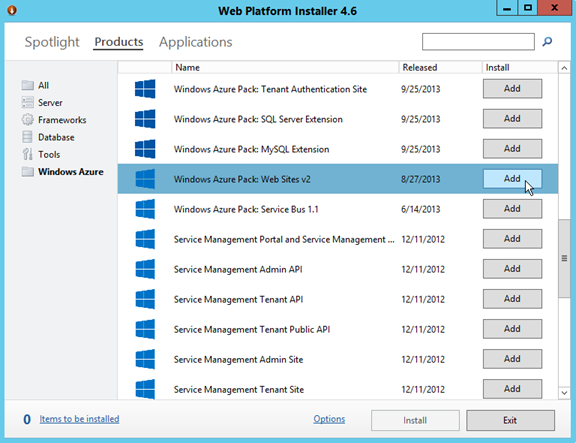
1. On the server that will become the Web Sites controller (for example, SitesCN1), install and launch the Web Platform Installer.
2. On the Products tab, click Windows Azure. Click Add next to Windows Azure Pack: Web Sites v2, and then click Install.
3. Review the items to be installed. Some of these items are third-party dependencies. For a separate reference list, see Windows Azure Pack: Web Sites Dependencies.
4. Click I Accept to accept the license terms if you agree with them.
5. On the Prerequisites page, choose Use Microsoft Update when I check for updates (recommended) to keep Windows Azure Pack components updated.
The installation begins. You can view the progress in the setup wizard.
If, for any reason, the installation is not successful, the installer tells you which components did not install and provides a link to the installation log file.
6. After installation is complete, click Continue to open the Configuration site.
If your browser displays a certificate security warning (a self-signed certificate is being used at this point), click Continue to this website (not recommended). The Web Sites Setup configuration page will appear.
Specify database and file servers and shares, and provide credentials
1. On the Database Server Setup page, in the Server Name field, enter the name of the SQL Server instance that the Controller will use to store the Web Sites Runtime database. This database will store web site hosting and resource usage information.
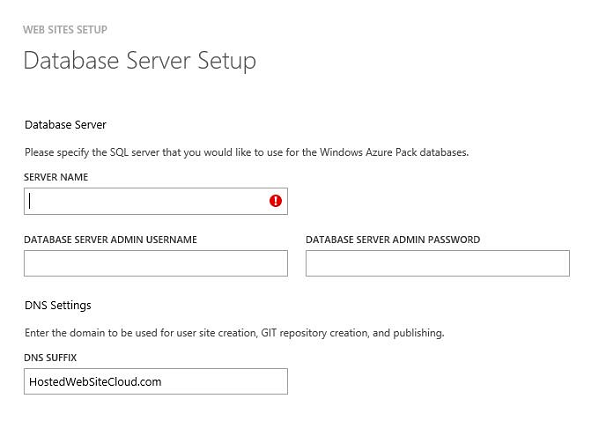
2. Enter the server name on which the SQL Server database is located, the database server administrator user name (sa), and password.
3. Enter the DNS suffix (the default domain for user web sites), and then click the next arrow on the bottom right of the page.
4. On the Web Sites Role Setup page, in the Management Server Name field, enter the name of the server that will run the management server role, such as SitesMN1.
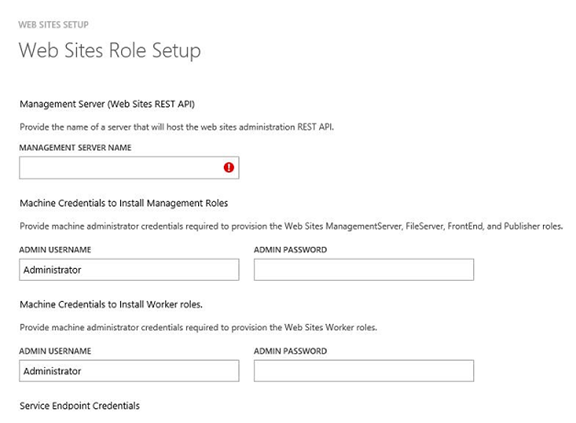
5. Under Machine Credentials to install Management roles, enter the administrator user name and password.
The admin user should be either:
· A domain account that is a member of the local Administrators group on all web site cloud role servers, excluding the web workers; or,
· A local account that is a member of the local Administrators group on all web site cloud role servers, excluding the web workers. If you use a local account, the account name and password must be identical on all servers, excluding the web workers.
|
|
When specifying a domain account administrator user name, remember to include the domain name prefix (<DomainName>\<UserName>).
6. Under Machine Credentials to install Worker roles, enter the administrator user name and password.
The administrator user should be either:
· A domain account that is member of the local Administrators group on all web workers; or,
· A local account that is a member of the local Administrators group on all web workers. If you use a local account, the account name and password must be identical on all servers.
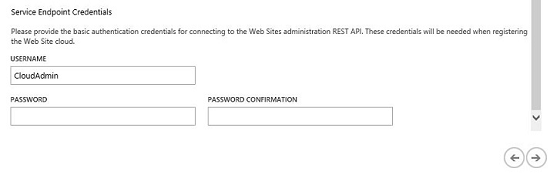
7. Scroll down to provide Service endpoint credentials. Enter the user name and password to be used to connect to the REST endpoint. Confirm the password by entering it again.
|
|
Make a note of these credentials as they are required to register your Web Sites REST endpoint in the management portal for administrators.
8. Click the next arrow on the bottom right corner of the page.
9. Indicate the type of file server you are using: Standalone, Pre-configured Windows File Server, or a Pre-configured Non-Windows File Server.
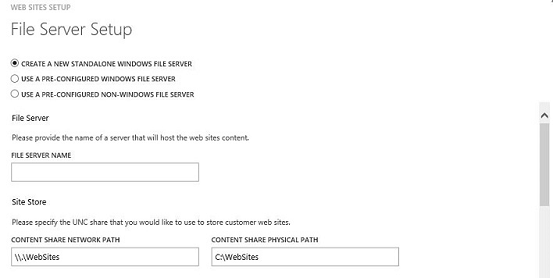
10. If you are creating a standalone file server, provide the File Server Name. If you are using a pre-configured file server after following the steps in Pre-configure a Windows File Server Cluster or NAS device for Windows Azure Pack: Web Sites, use the appropriate pre-configured file server option and specify the network path including the file server name.
11. Enter the Site Store information. If you are using a pre-configured file server, enter the content share network path including the file server name. Use the format \\<fileserver>\WebSites. If you are creating a standalone file server, the path is automatically populated with \\<new file server>\WebSites. For a standalone file server, you also need to enter the physical path to the content share (by default, C:\WebSites).
12. Enter the File Share Owner user name and password. Confirm the password by entering it again.
|
|
You may need to scroll down to see these fields.
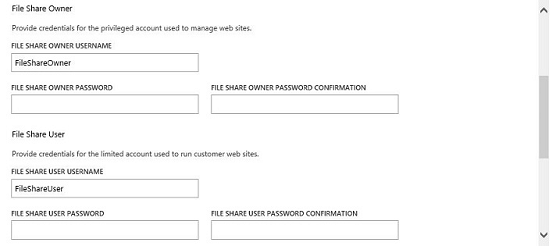
13. Enter the File Share User user name and password. Confirm the password by entering it again.
14. Enter the Certificate Store information. Enter the network path to the certificate share. If you are creating a standalone file server, you also need to enter the physical path to the content share.
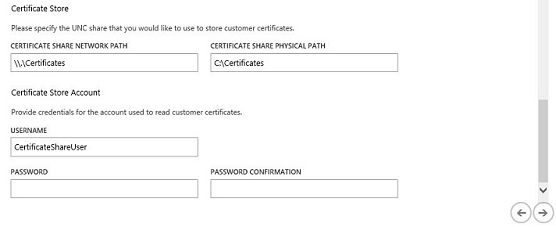
15. Enter the user name and password for the Certificate Store Account. Confirm the password by entering it again.
16. On the bottom right corner of the page, click the Next arrow.
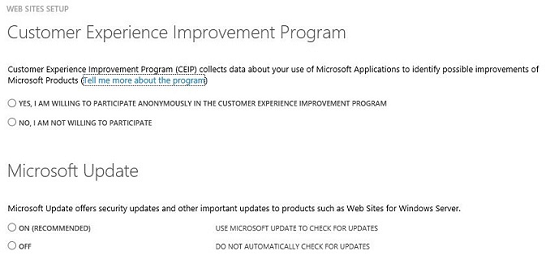
17. On the Customer Experience Improvement Program page, indicate whether to participate in the Microsoft Customer Experience Improvement Program (CEIP). Microsoft uses the data collected by CEIP to understand how customers like you use the controller. The data contains no personal information. The information collected helps identify problems and results in software improvements to better meet the needs of our customers.
Under Microsoft Update, select On (Recommended) if you want to use Microsoft Update to keep the Web Sites Cloud controller up to date. It is strongly recommended that you opt in to Microsoft Update so that you will know when there are security patches or vulnerability fixes available for Windows Azure Pack: Web Sites.
|
|
Updates for Windows Azure Pack: Web Sites are provided through Microsoft Update, not Windows Update. It is highly recommended that you enable both Microsoft Update and Windows Update for all of your Web Sites server roles. For more information on configuring Windows Update for Windows Server, see How to configure automatic updates by using Group Policy or registry settings.
|
|
Opting in to Microsoft Update does not affect the settings for when you will receive Windows updates.
On the bottom right corner of the page, click the Next arrow.
18. Review the features that are going to be configured, and then click the checkmark.
See Also
Deploy Windows Azure Pack: Web Sites